Overview
I wanted a realistic image of the gym I’m planning for Athleneum. The early AI renders looked convincing at a glance, but the double-sided weight racks didn’t hold up. Uprights disappeared, benches faced the wrong way, and one barbell looked like it was floating. Even photos of real racks didn’t reliably fix it.
What worked was building the whole gym in Blender first: the racks, cardio equipment, windows, mirrors, and people, all in one scene. Then I sent the Blender render to OpenAI and asked it to make the same view look like a photograph. Getting there meant trying two different ways of combining 3D and AI before I found one that worked.
Generating the gym directly
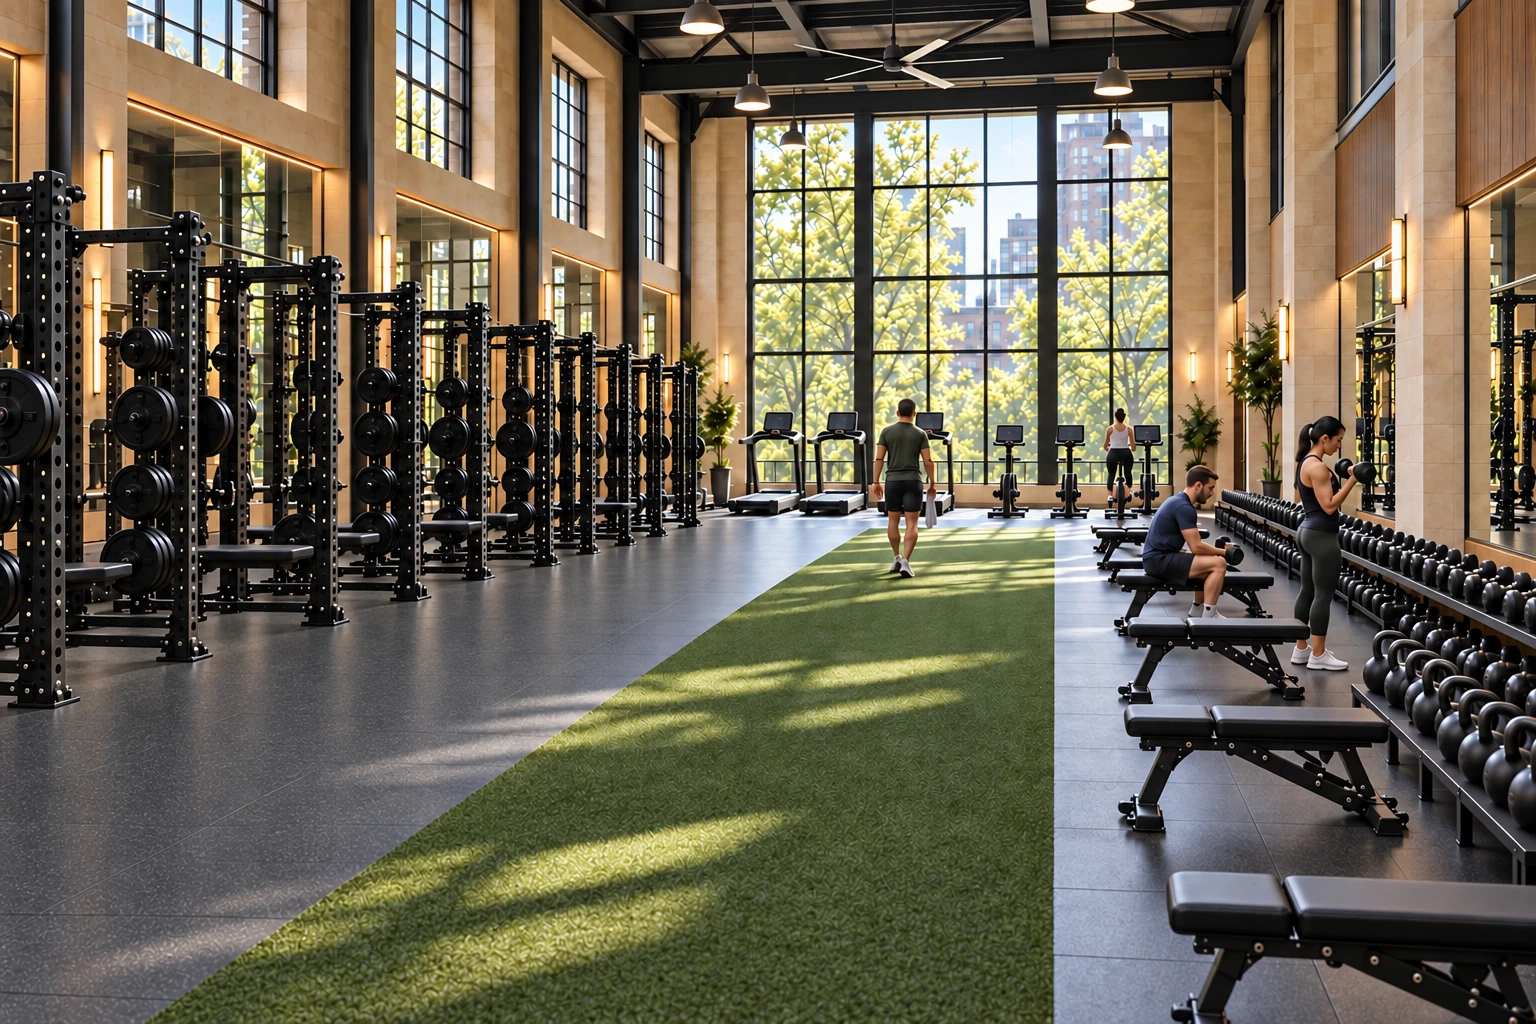
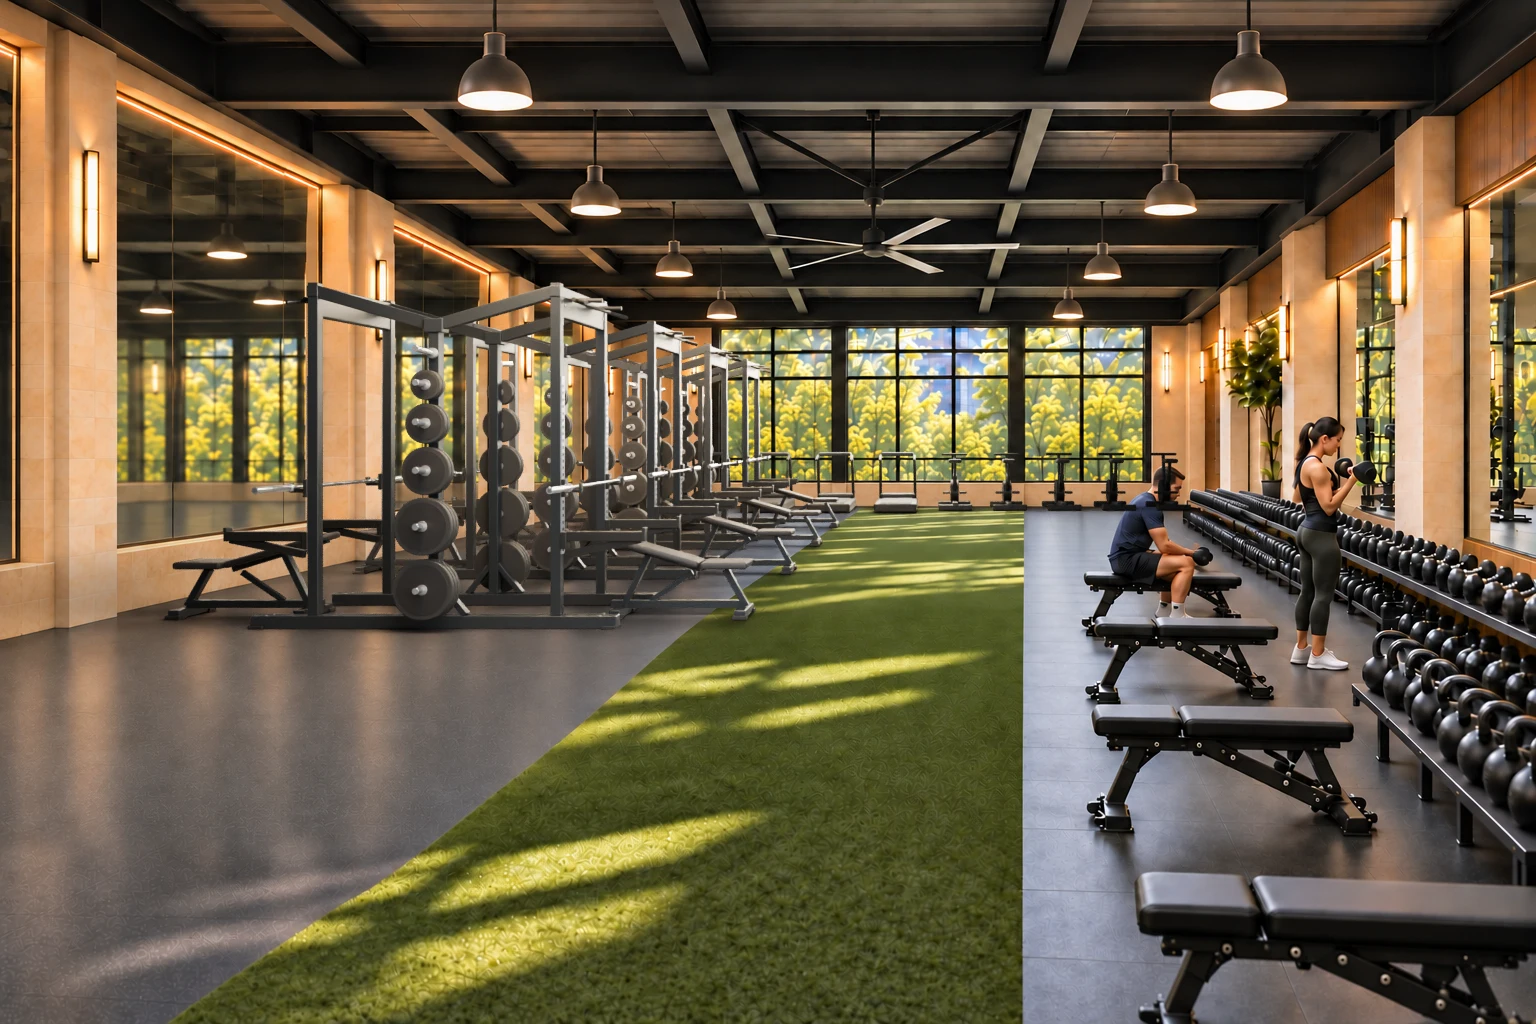
The original concept had what I wanted on the floor: racks on the left, turf down the middle, dumbbells and kettlebells on the right, and cardio by the back windows. It also had a double-height ceiling that might be hard to find in a real building. I wanted to keep the daylight and make the gym work on one floor.
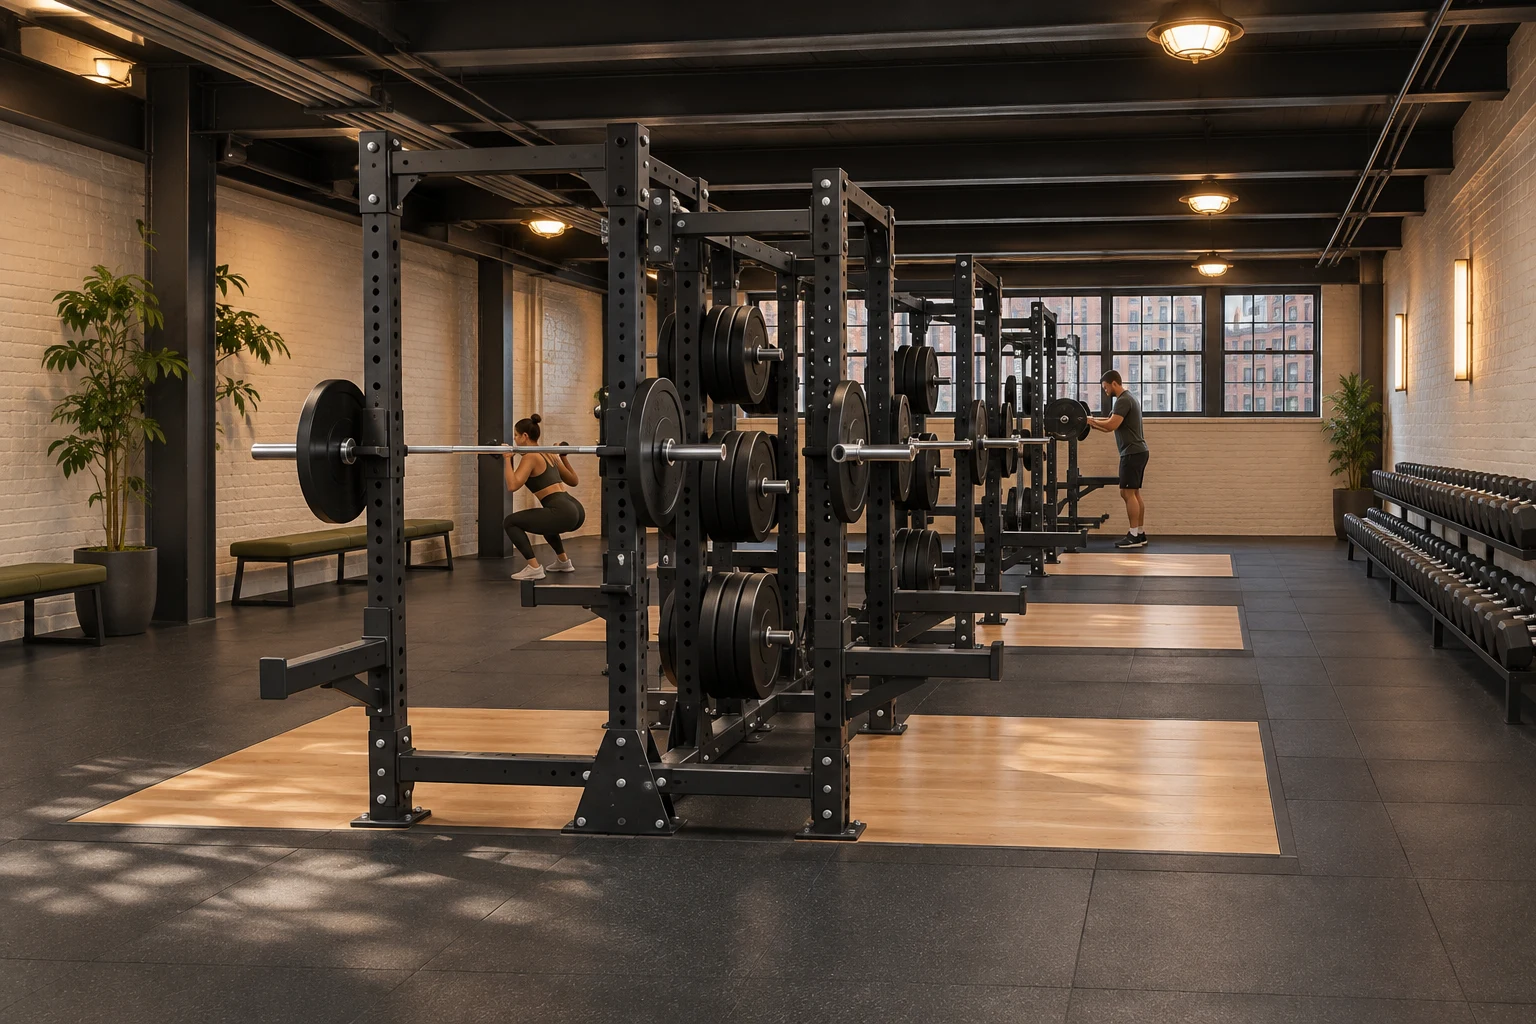
I also wanted back-to-back lifting stations like the ones I remembered from the Rhodes weight room. Two people should be able to use the same rack from opposite sides, each with a bench and a racked barbell. The first batch of lower-ceiling concepts gave me a good sense of the room, but I couldn’t tell how both sides of the racks would actually work.
Trying again with real rack photos
I started with photos from Rhodes and equipment makers, then looked for a side or three-quarter view of a real installation. The photo of Lindbergh High School’s weight room was the one I kept coming back to. I could follow each bar to its hooks and see how the plates hang off the sides, leaving the floor between the two lifting positions open.
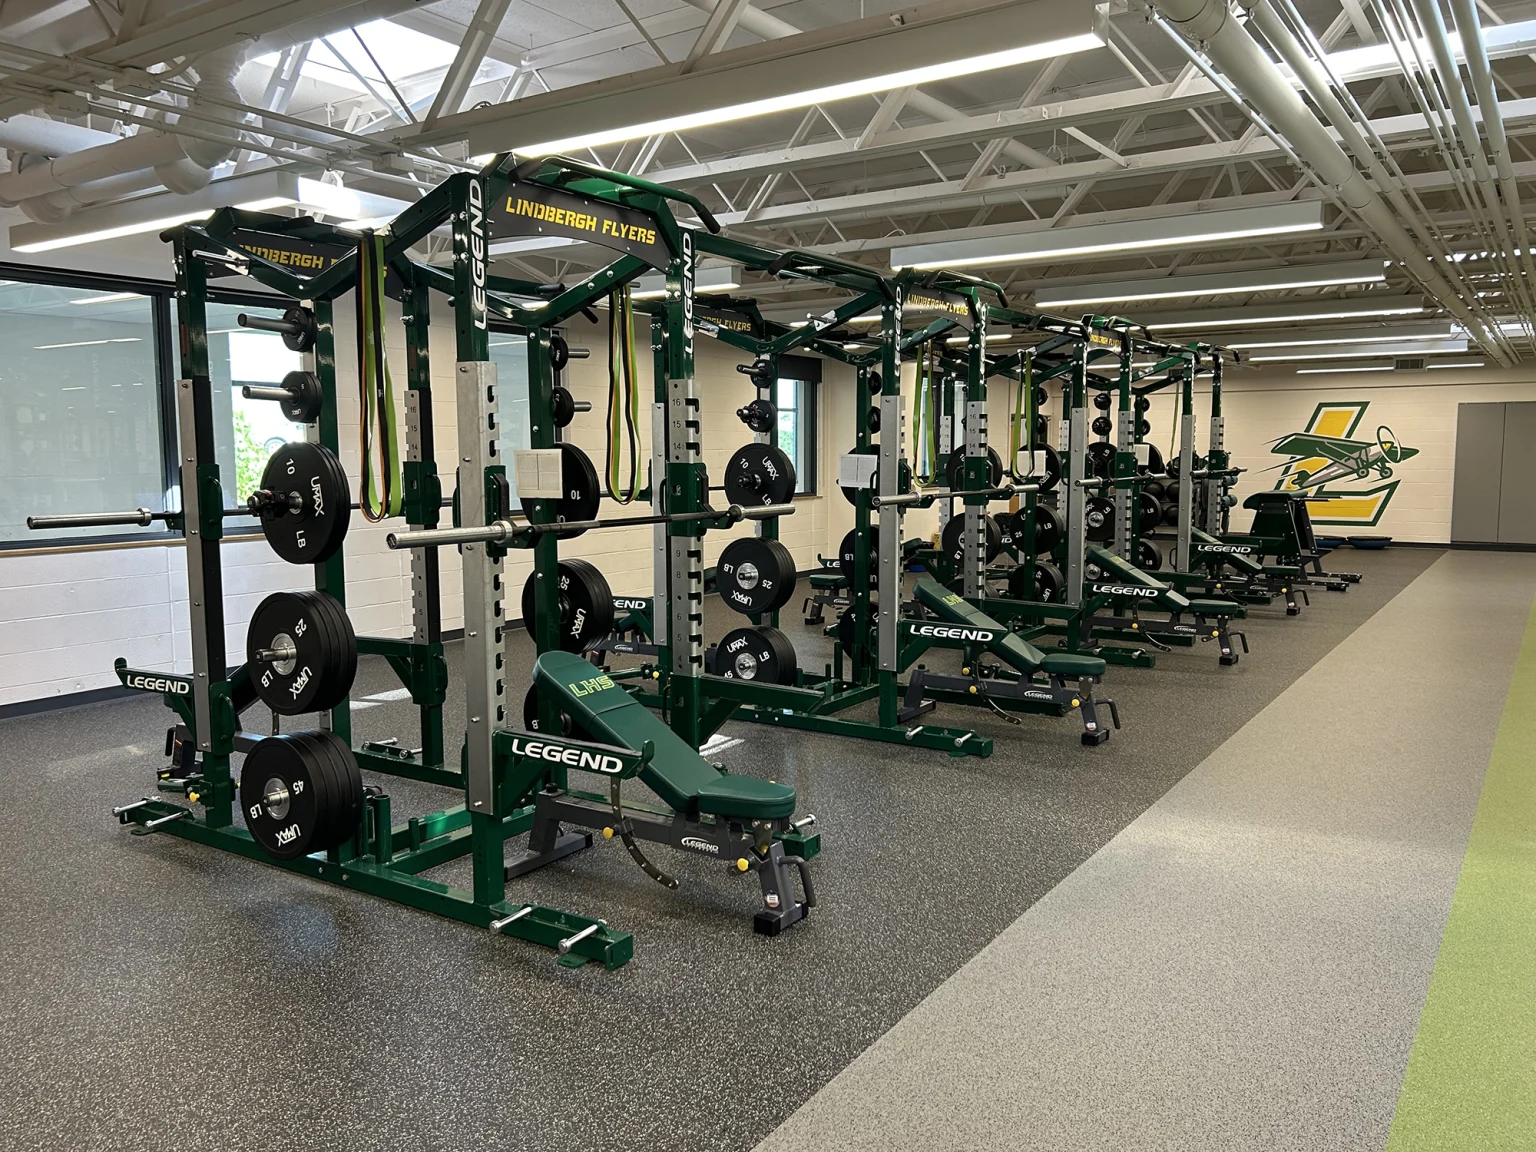
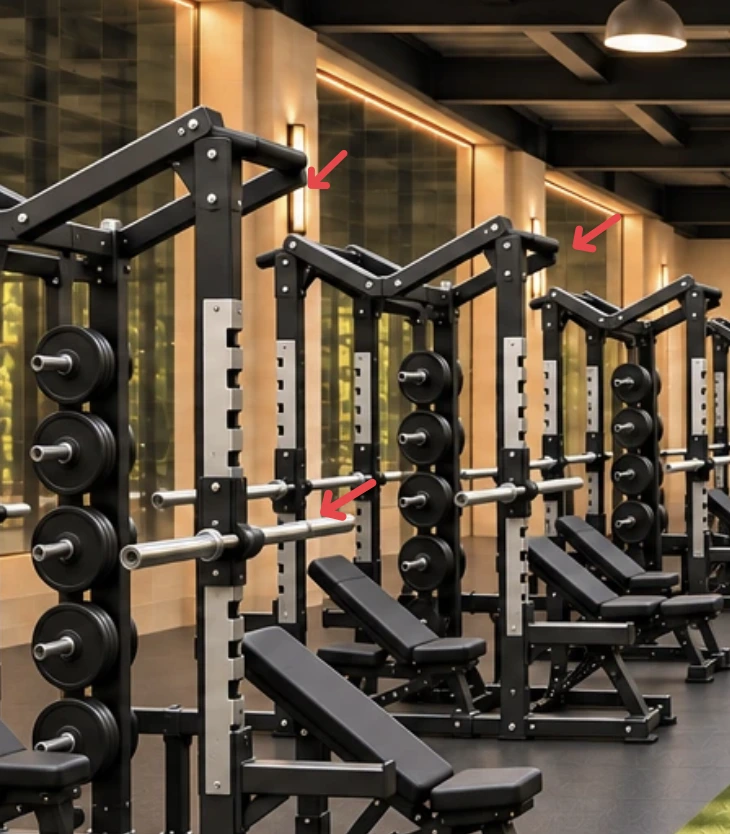
I used that photo to guide edits to the gym render. The racks started to look more like the equipment I wanted, but the same problems kept coming back. A revision fixed a treadmill’s running deck and still left the far end of a barbell hanging in midair. In later passes an upright looked like it ran through a bench, and some benches were either missing or facing the same direction.
Researching a better way
After enough rounds of circling the same mistakes, I asked whether I should make a CAD model first. I looked at other image models too, but the missing hook wasn’t about the overall quality of the picture. It was about whether one part attached to another, and whether that relationship survived four times down the row.
I settled on Blender because I needed a dimensioned scene I could inspect and render, not a full set of architectural plans. I used the Legend Fitness #3227 as a starting point. A Python script built one double-sided rack with its uprights, benches, bars, and J-cups (the hooks the bars rest in). Once that assembly was right, I could repeat it without having to redraw any of the hardware.
Putting Blender racks into the generated gym
I already liked the room in the generated image, so I tried keeping it. I used OpenAI to erase the old rack row, then composited the rack equipment rendered in Blender into the cleared space. When I compared the model with Lindbergh again, I added outward-facing plate pegs halfway between the two lifting faces.
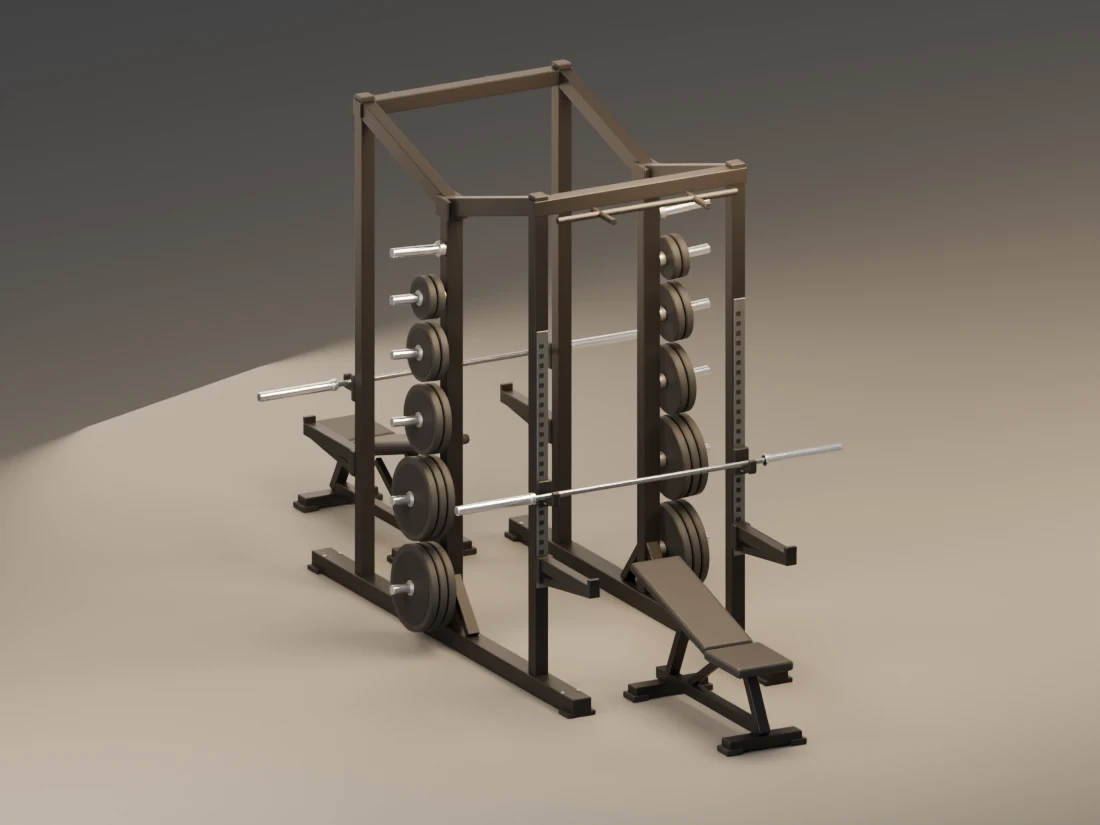
The equipment now held together on its own. But lining it up with the old image was a separate problem. In a later composite a bench landed on the turf, and a bike’s upright crossed in front of a seated person. The pieces made sense in Blender and didn’t quite fit together in the picture.
Building the whole gym and patching in details
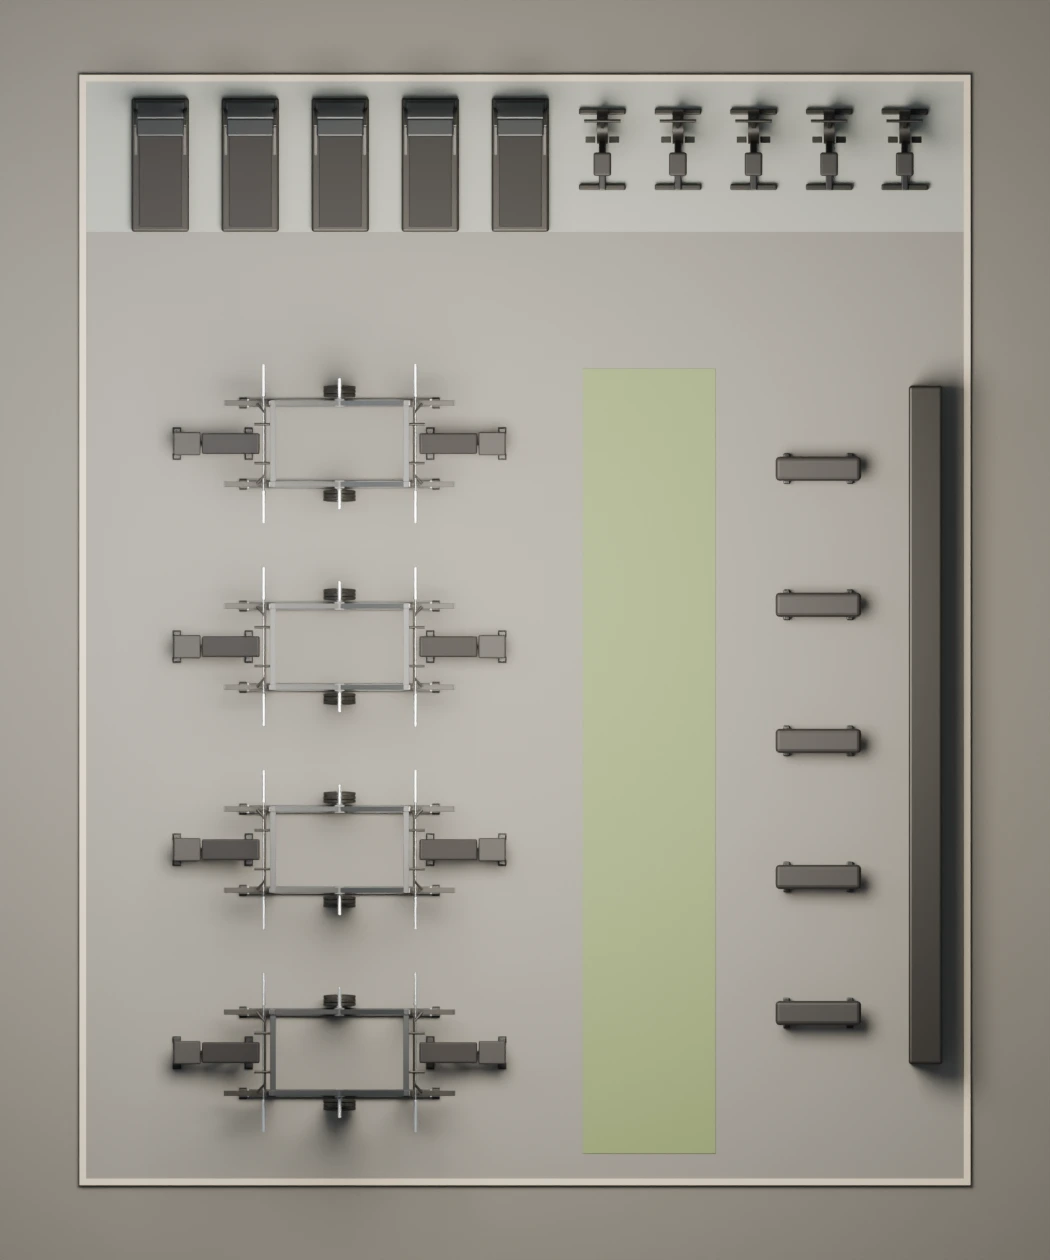
Instead of lining up the equipment with an existing picture, I built the room around it. The overhead plan let me count four double-sided racks, eight lifting benches, five treadmills, and five bikes, and check that there was room to walk to the cardio wall. The mirrors, windows, turf, and two simple figures went into the same scene, on the same floor.
The first camera view showed too much empty floor. I moved the camera closer rather than moving the racks. The people still looked like mannequins, but I knew where they stood and how tall they were next to the equipment.
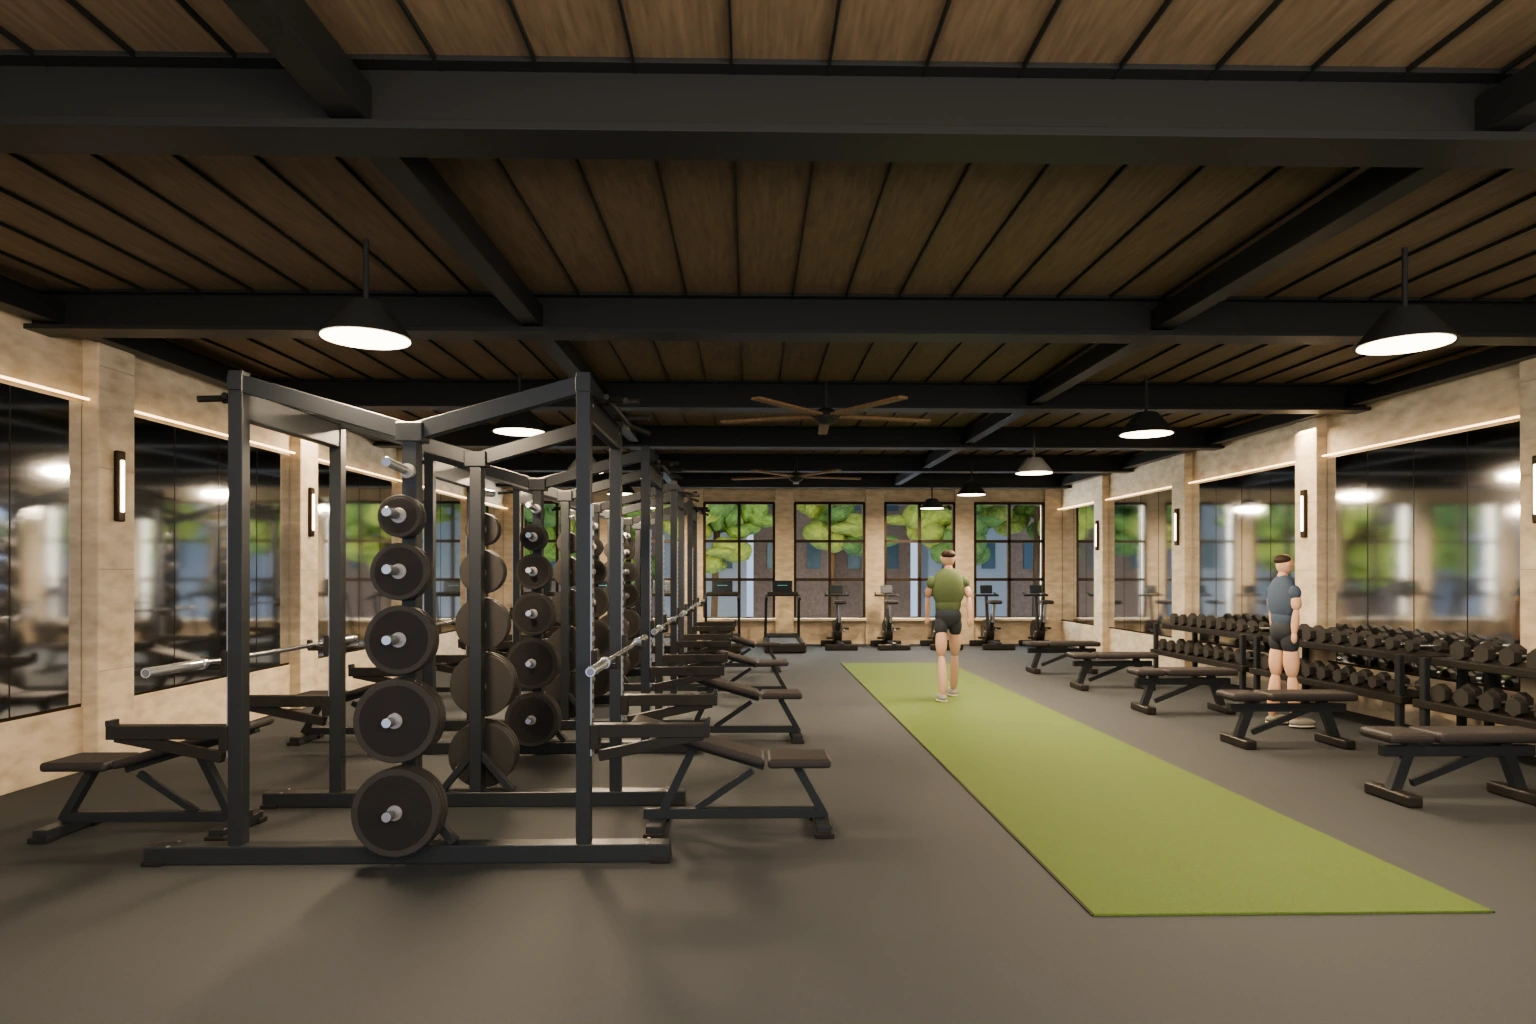
My first attempt to finish it kept the Blender render and patched in more realistic people, views through the windows, and floor texture. The patches looked fine in isolation. Together, it still looked like a Blender render with pictures of people pasted on top.
Giving OpenAI the whole scene
I didn’t want better cutouts. I wanted the scene itself to look like a photograph. So I sent the whole render to the OpenAI Images Edits API without a mask, along with two reference images. I gave each image a different job:
- The Blender frame set the camera, layout, scale, and placement of every object and person.
- The Lindbergh photo guided the rack hardware, not the colors or layout of the gym.
- An earlier Athleneum render served as a reference for daylight and materials, not composition.
Here’s how the prompt started:
Re-render image 1 as ONE cohesive, truly photoreal editorial architecture photograph of the SAME Manhattan clubhouse gym, not a pasted or isolated detail edit. Image 1 is a complete approved Blender scene and the authoritative geometric blueprint for every surface, person, and object.
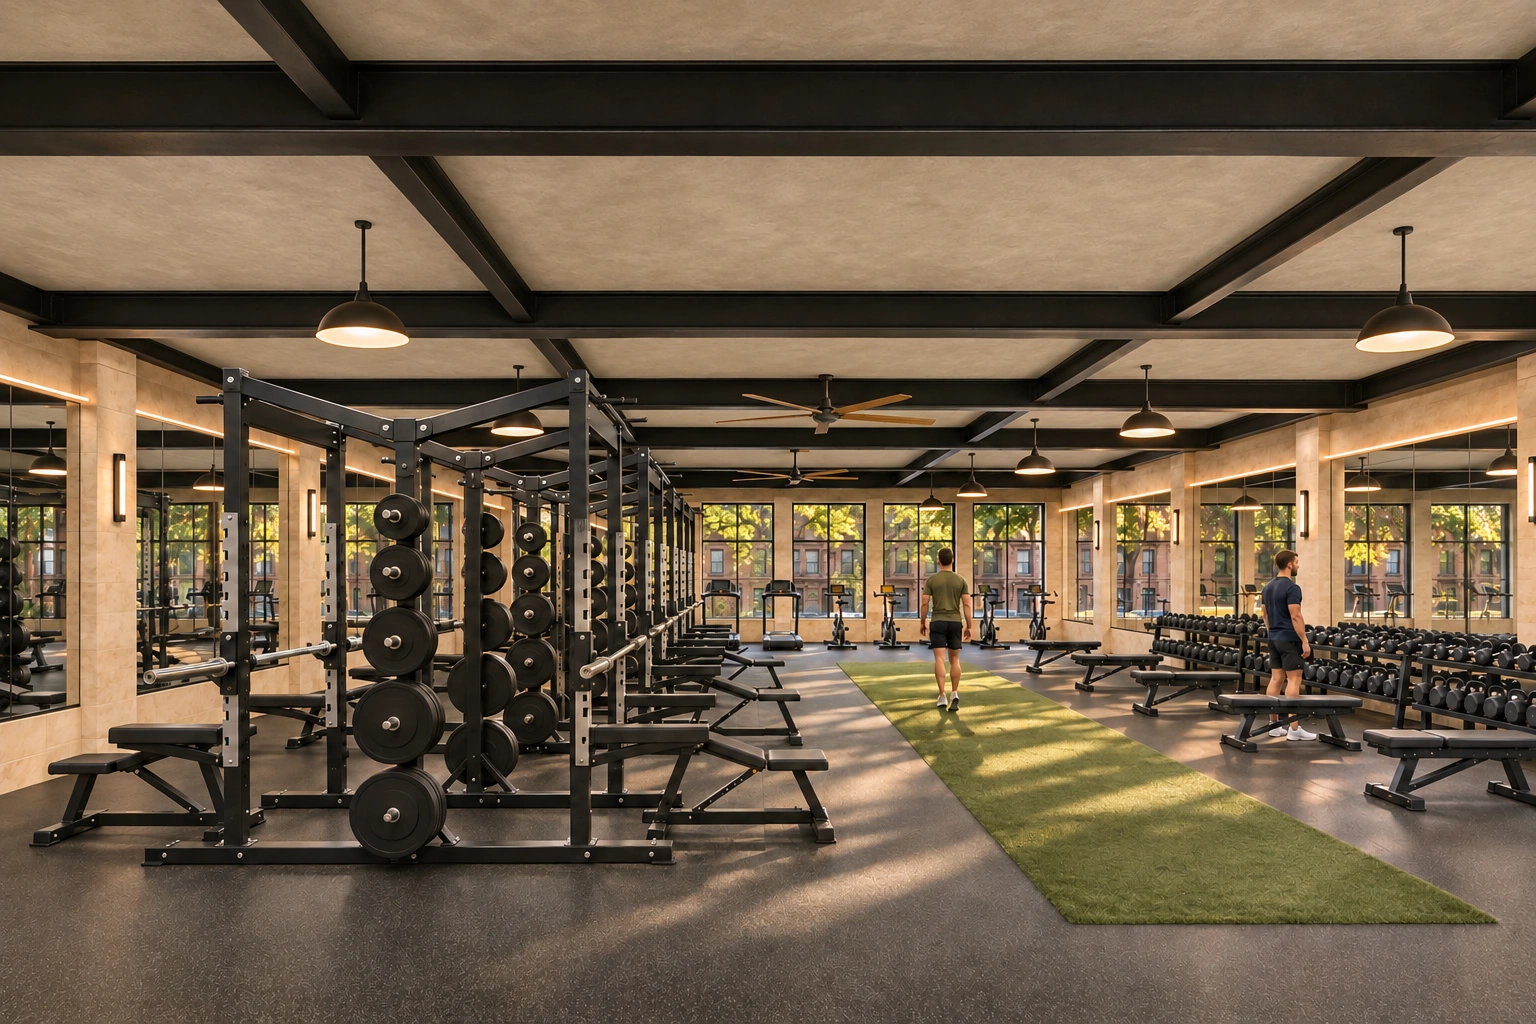
I spelled out what should stay put: the eye-level camera and crop, all four rack frames, a bench on each side, two hooks per bar, and a clear path to cardio. Rendering the whole image in one pass made a bigger difference than polishing any one detail. The light crossing the turf, the shadows under the equipment, and the people all looked like they belonged in the same room.
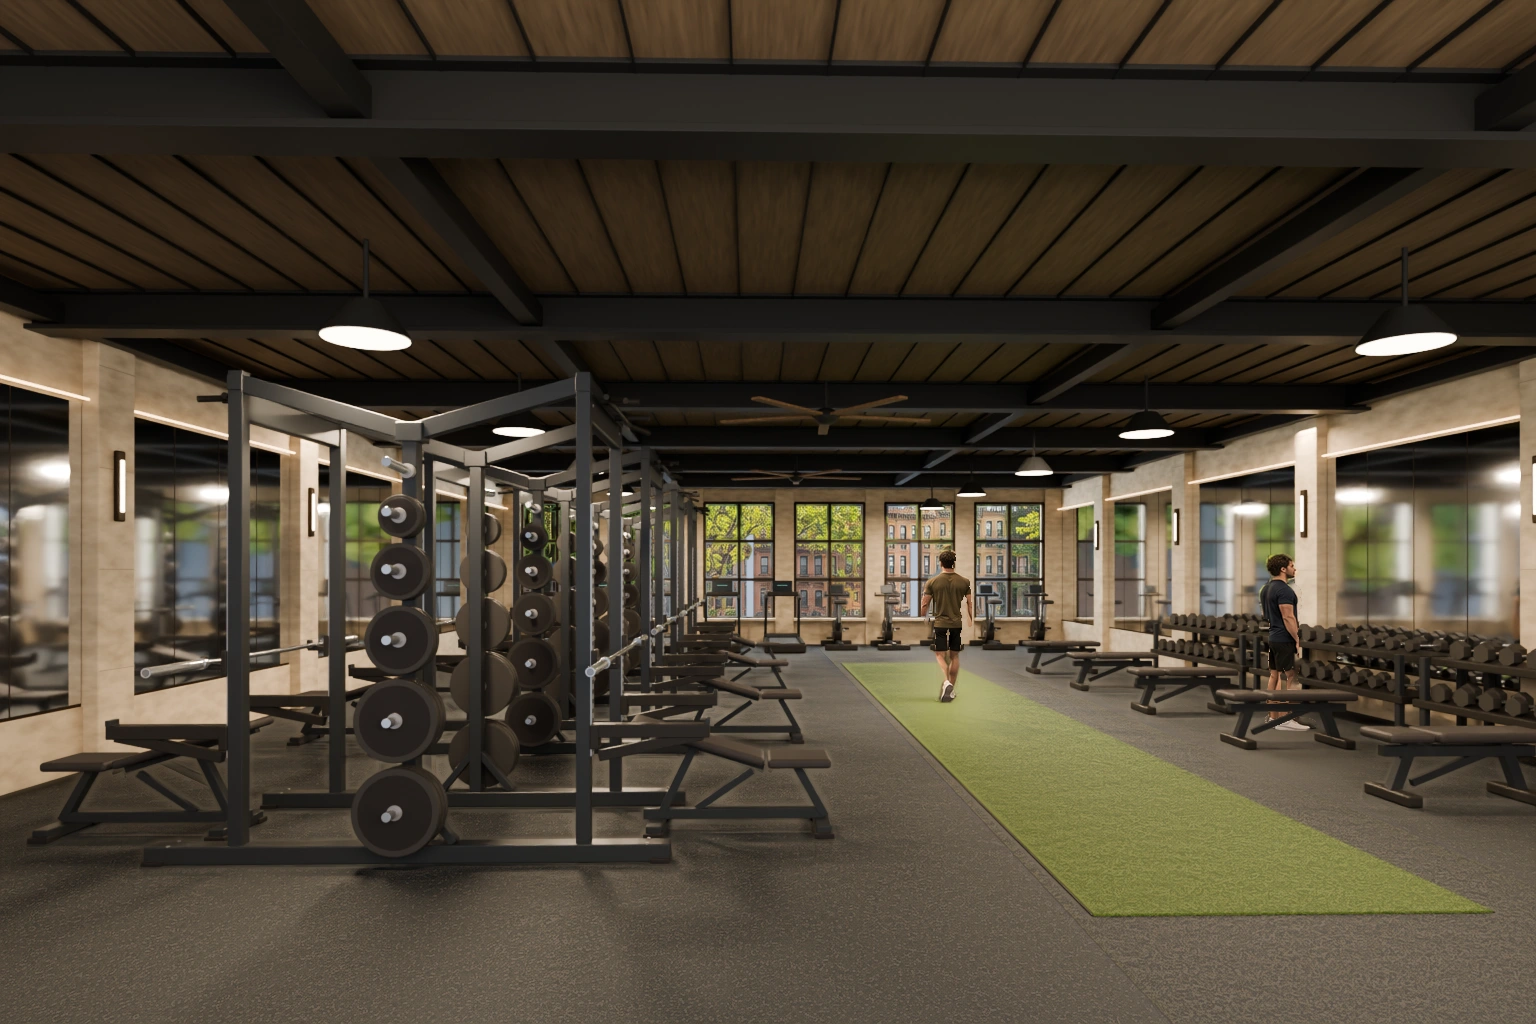
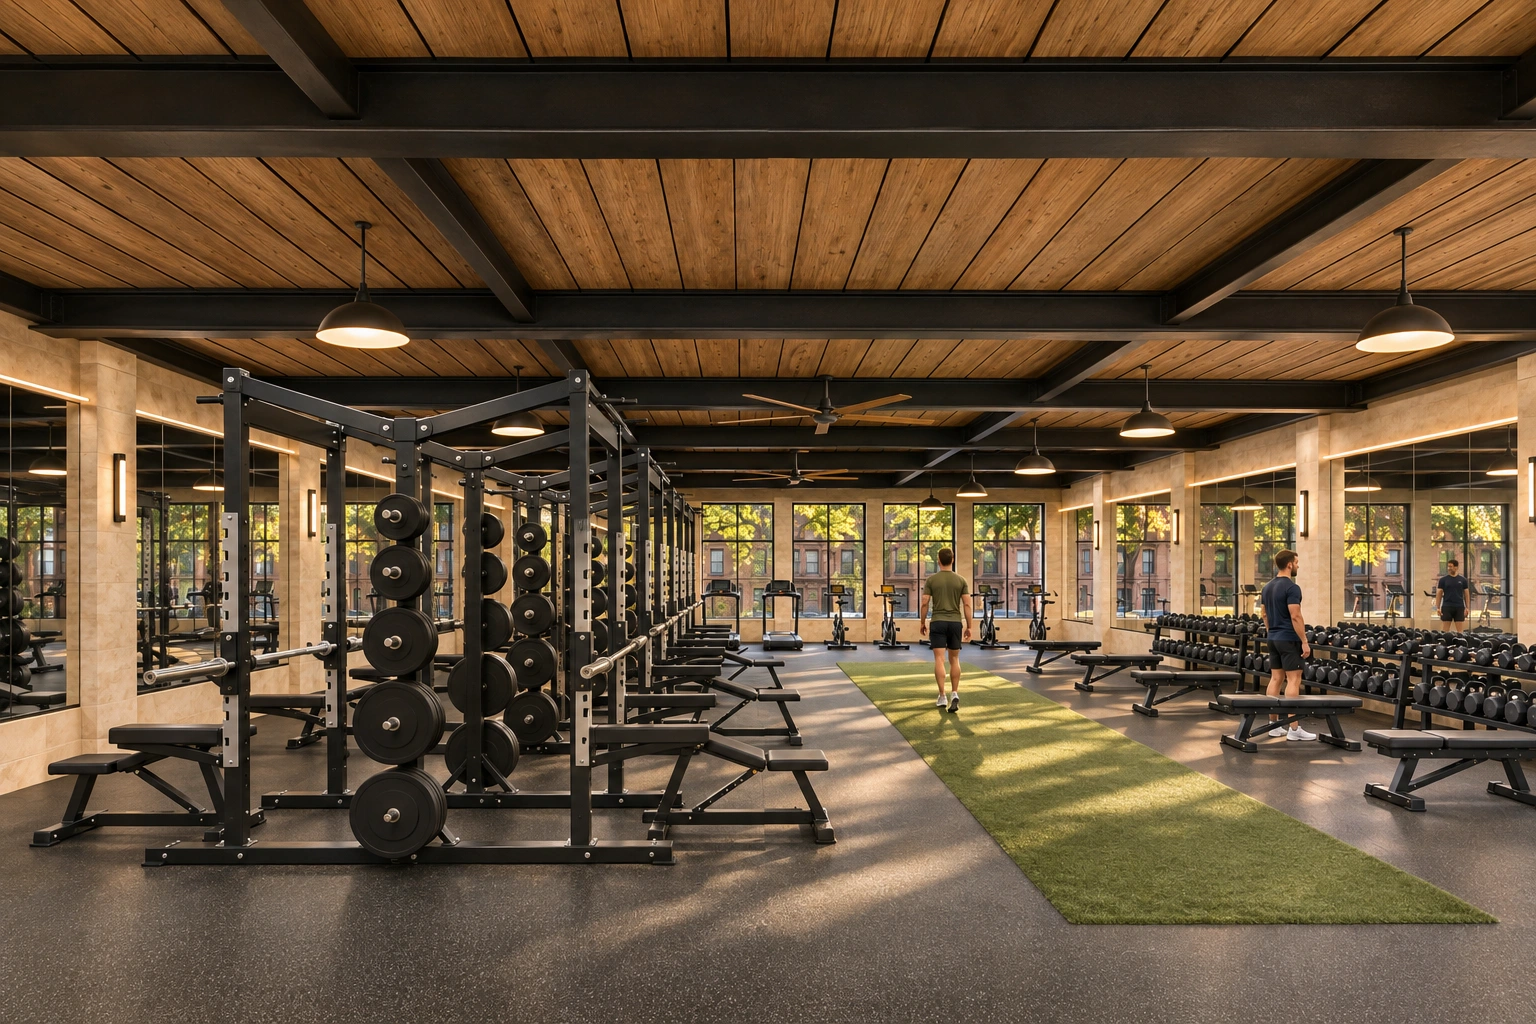
I checked the result against the Blender frame. The right mirror still had a figure that looked like a third person by the windows. I removed it in one last edit and swapped the wood ceiling for matte warm gray. I still count the cardio machines in Blender, not from this angle: the rack row hides part of the treadmill lineup.
The Lindbergh photo was helpful both times, but it couldn’t tell the model where every part of my gym belonged. The complete Blender scene could. Next time I need something to look real and fit together, I’ll model the things I need to count, measure, or position, then let the image model work on the whole frame.